As a sequel to last week’s post, I wanted to share a few more bits and pieces to consider while brainstorming about your creative space… Things like drying racks, mirrors, and maybe some ergonomic tools if needed! :) Some heavy hitters in all of my studios working diligently behind the scenes to keep things on the up and up. Most of my solutions have been a result of limited square footage, so for those of you making something out of nothing, I got you!
Over the next few blog posts I’ll hit on all of these fun things. So lets start with an important one…
How to protect your wet paintings while drying: Enter, the drying rack! If you like to work on many paintings at once (as do I), and many different sizes, there is always a fresh painting if not MANY paintings vulnerable to the elements out to destroy everything you’ve worked so hard for…. dust, cat hair, earthquakes, a dance party that spins out of control, you name it…. It’s important to have a place to safely store your paintings. And it’s important to save on space! Storing your paintings vertically, like books on a bookshelf but separated slightly, is great for saving space. I’ve built drying racks in all of my studios in several different ways, so I’d love to share a couple of those solutions with you that will hopefully get your creative juices flowing…
DIY “drying rack” ideas:
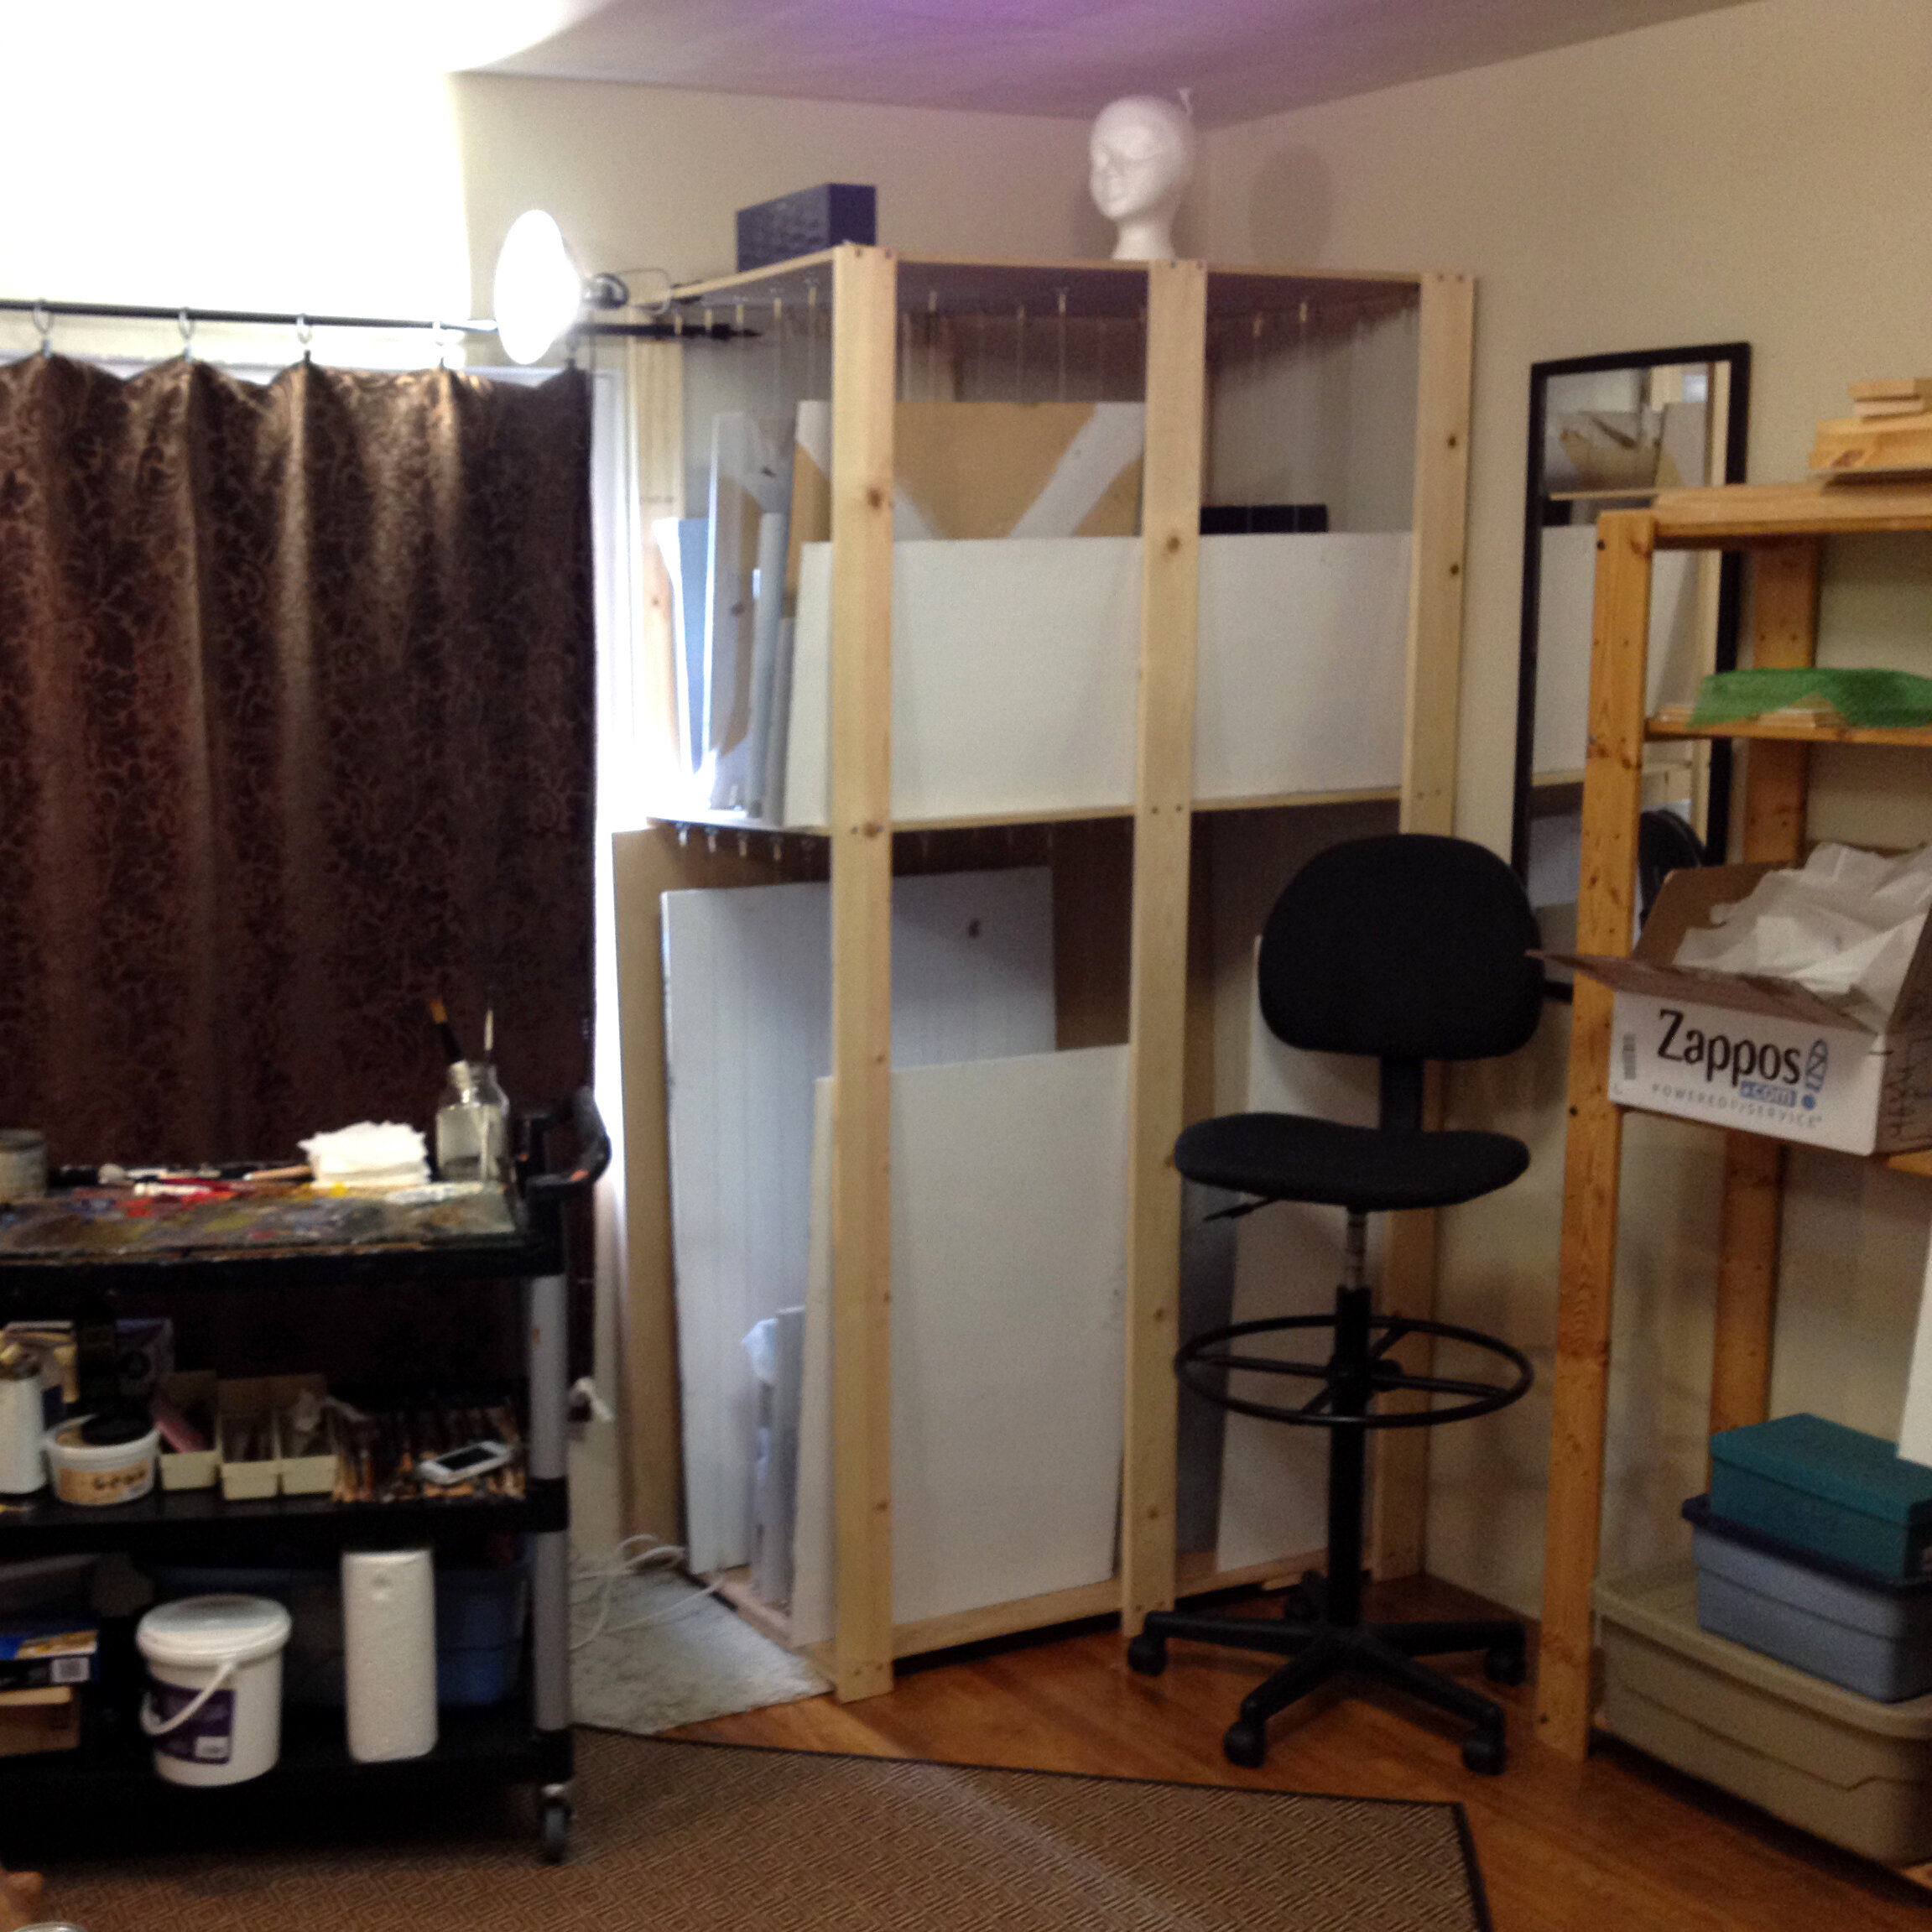
Drying rack made from wood, wire, screws, and scrap material (added later). I built it inside my studio, so it fit the space and could be larger than the door frame entering the studio. At one point I think I had at least 50 paintings plus extra frames stashed away in this thing!
Wood, wire, screws, and scrap material: This one is the most involved, but it’s 100% worth it if you have the time and resources. Pictured in the first four images, is the drying rack I built in my Oakland (bedroom) studio. I believe it was about 84”H x 36”W x 24”D. The bottom shelf is 50” tall to fit 48”x36” paintings easily and the top shelf is 32” tall fitting the small - medium size work. I created “drying slots” to vertically store my paintings while they dry, with picture wire and screws. I also attached material to the outside, covering the exposed paintings to help reduce dust (material not pictured). The great part is, you can customize this general design to whatever dimensions work with your space and paintings!
Materials used:
3 sheets of 24”x36” plywood
6 - 1”x4” wood beams
4 support beams under the bottom shelf (to hold several heavy paintings at once)
screws, L brackets, and tape
120 Eyelet screws and Picture Wire - 5 screws across the depth of the rack, spaced about 4” apart. And 6 wires stretching the width of the shelf about 8” apart. This created 6 slots, 36”L on each shelf to hold paintings. *Tip - you can also use doll rods to use as supports to create your painting slots.
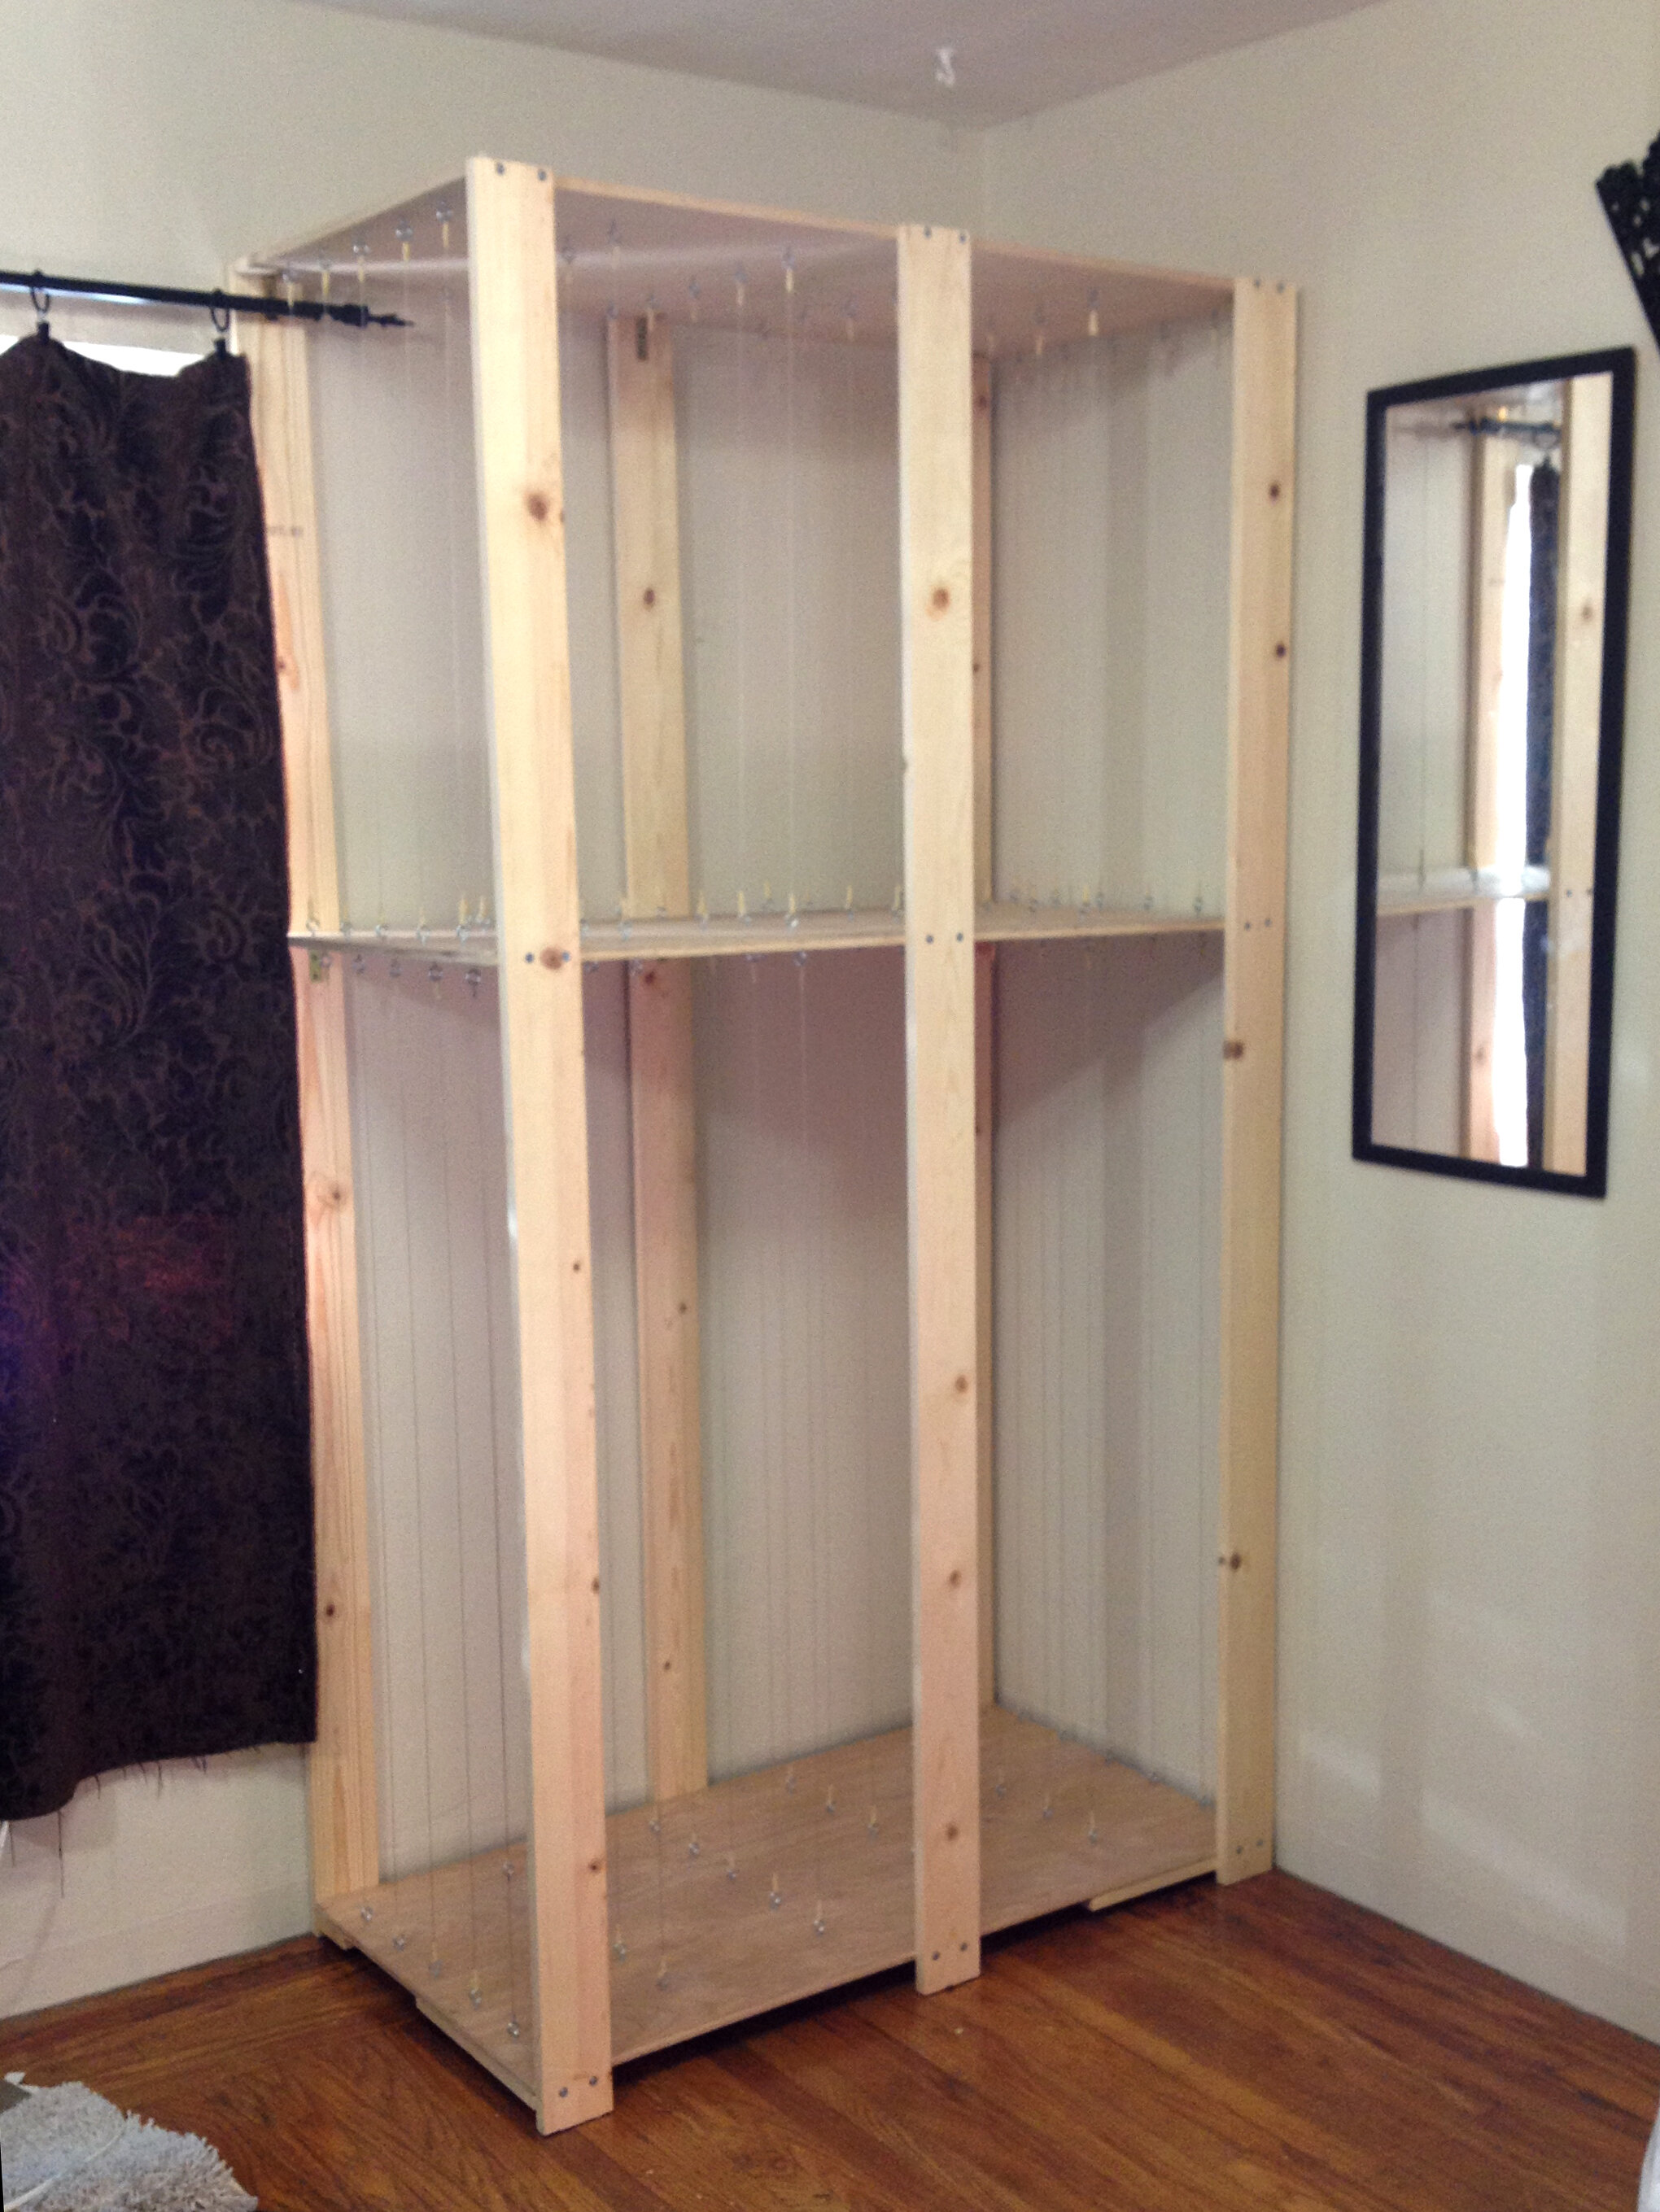
It appears smaller in this image, but the dimensions are 84”H x 36”W x 24”D *Tip: if you want to further protect your wet paintings from dust, add material, wood, cardboard etc. to the outside to create “walls”. BUT, make sure there is still airflow to help with drying time.
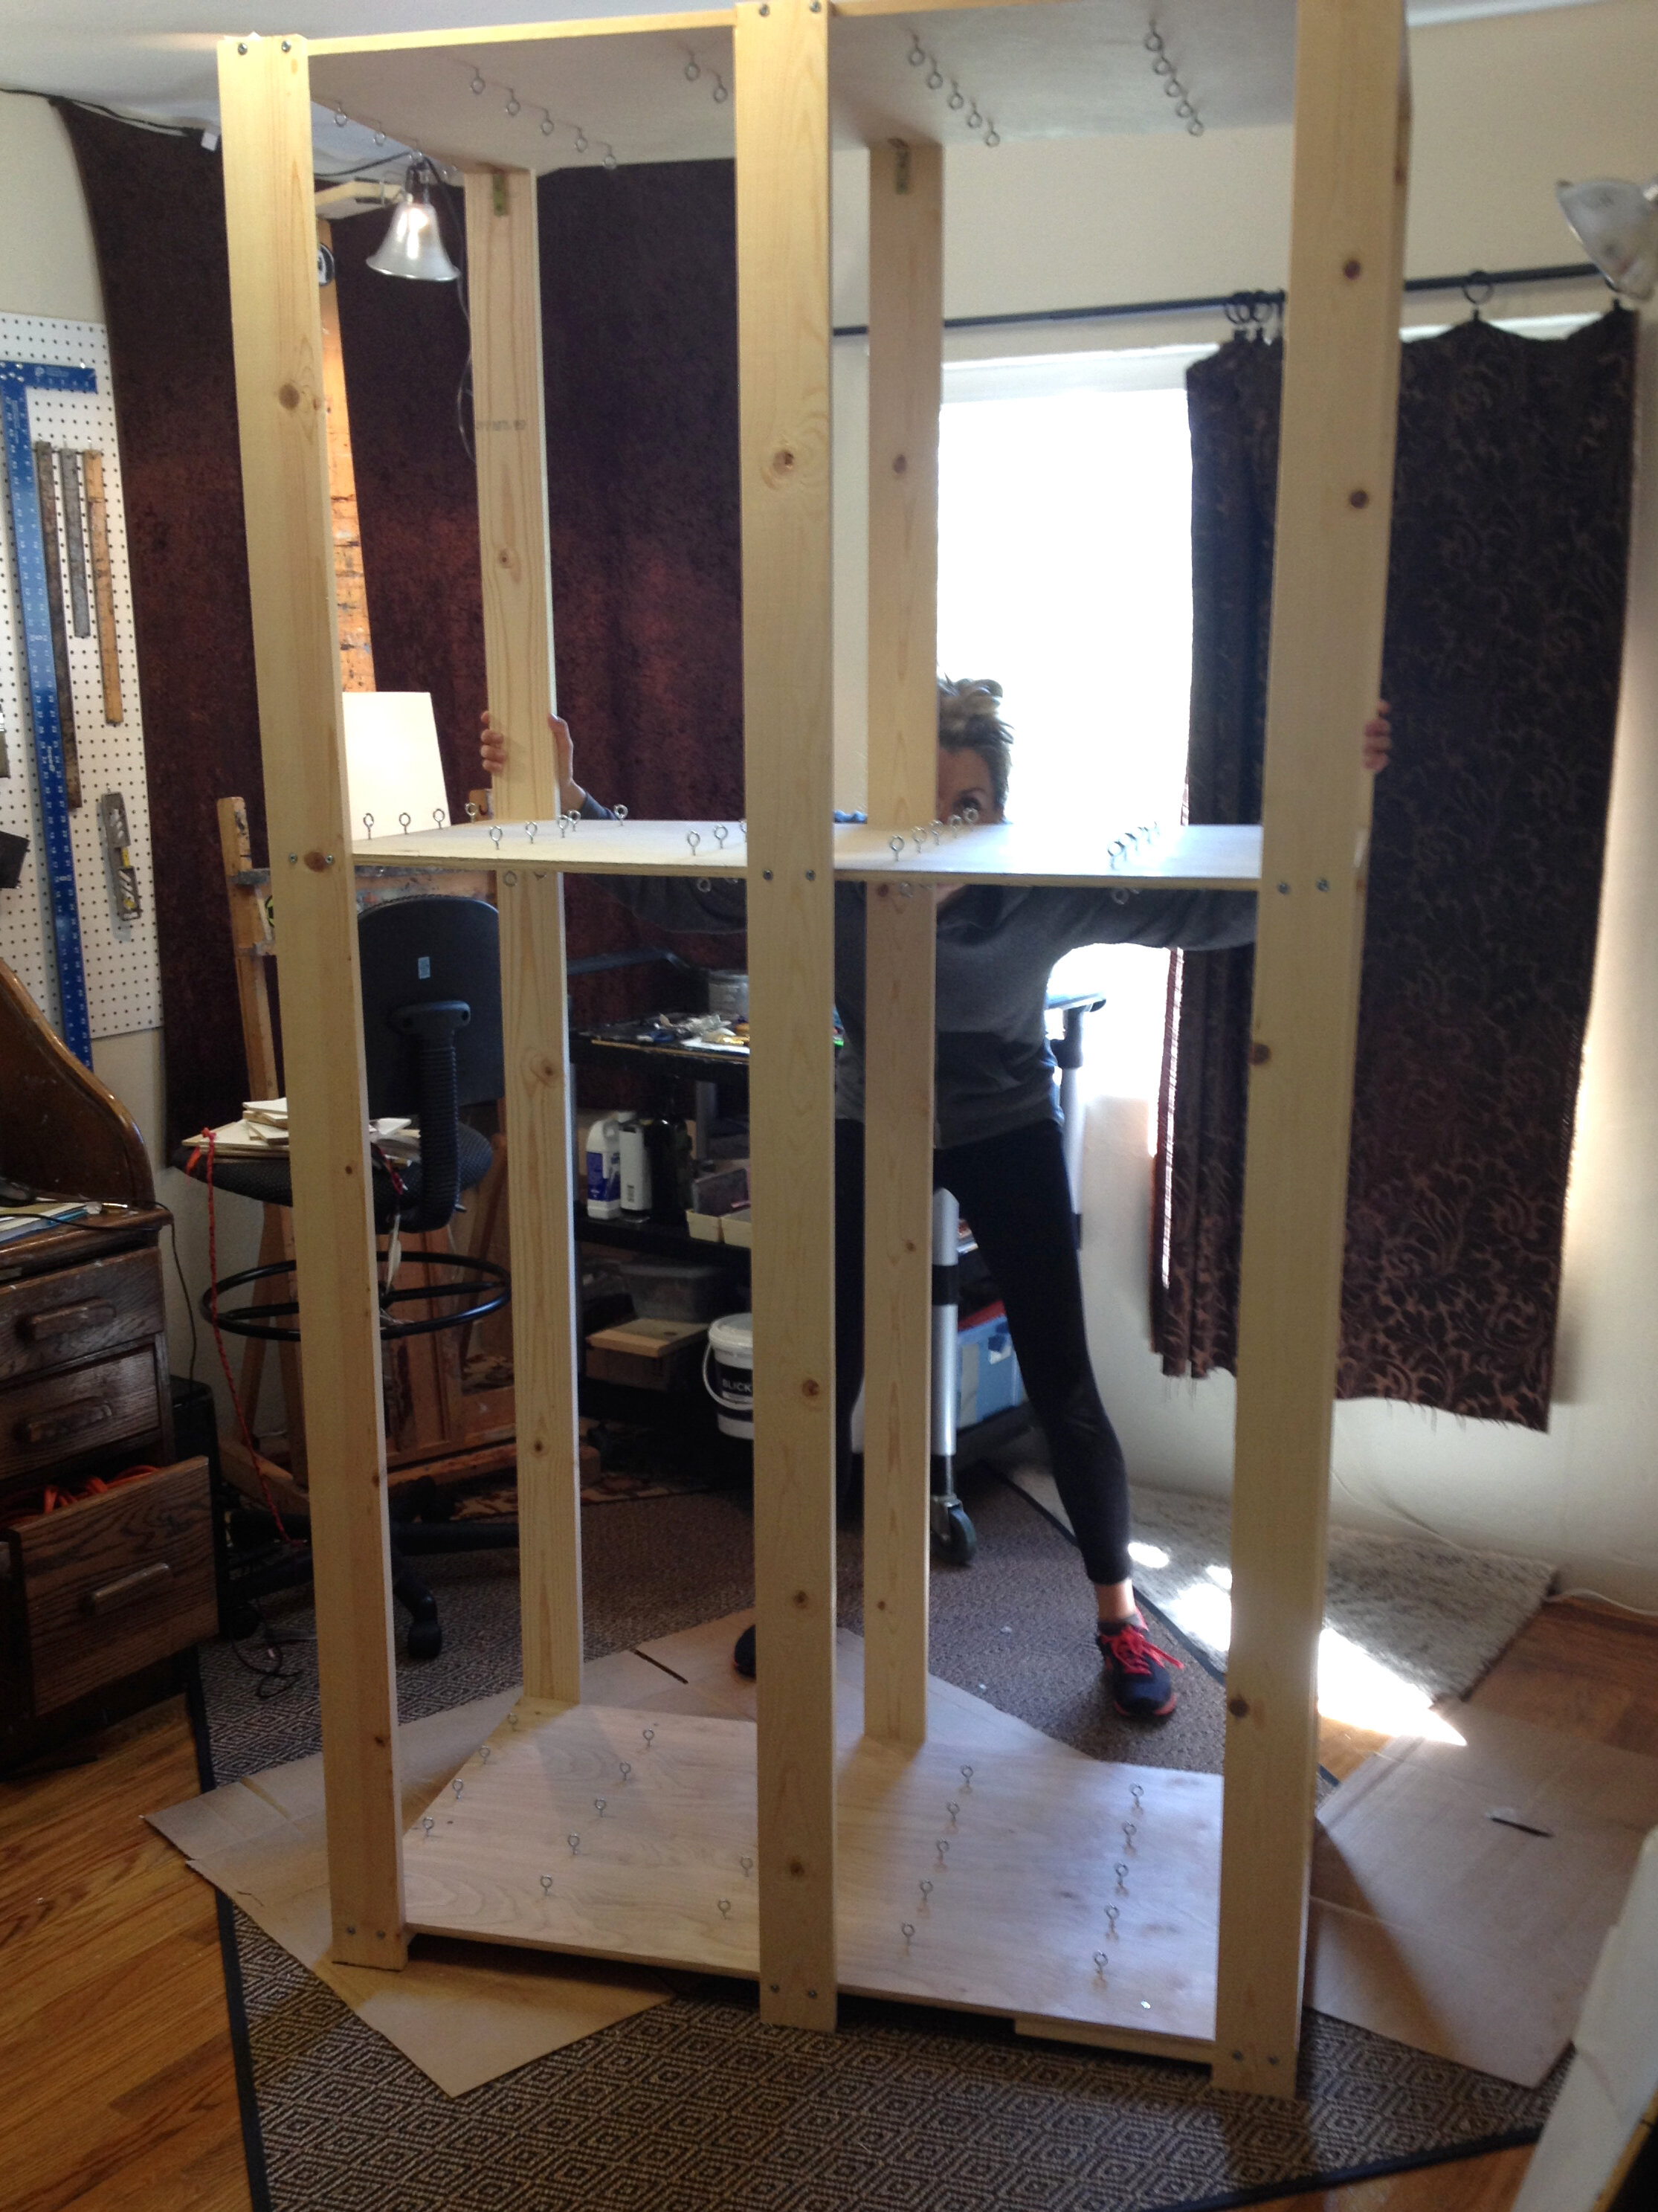
Screws are in, now for the wire! This part took awhile but it was the simplest solution at the time for the resources I had. I used this drying rack for 6 years, and it fit all of my paintings, frames, and extra panels. And when I moved, I simply removed the 1”x4” beams and the entire rack (with wires) shrunk down flat to be stored.
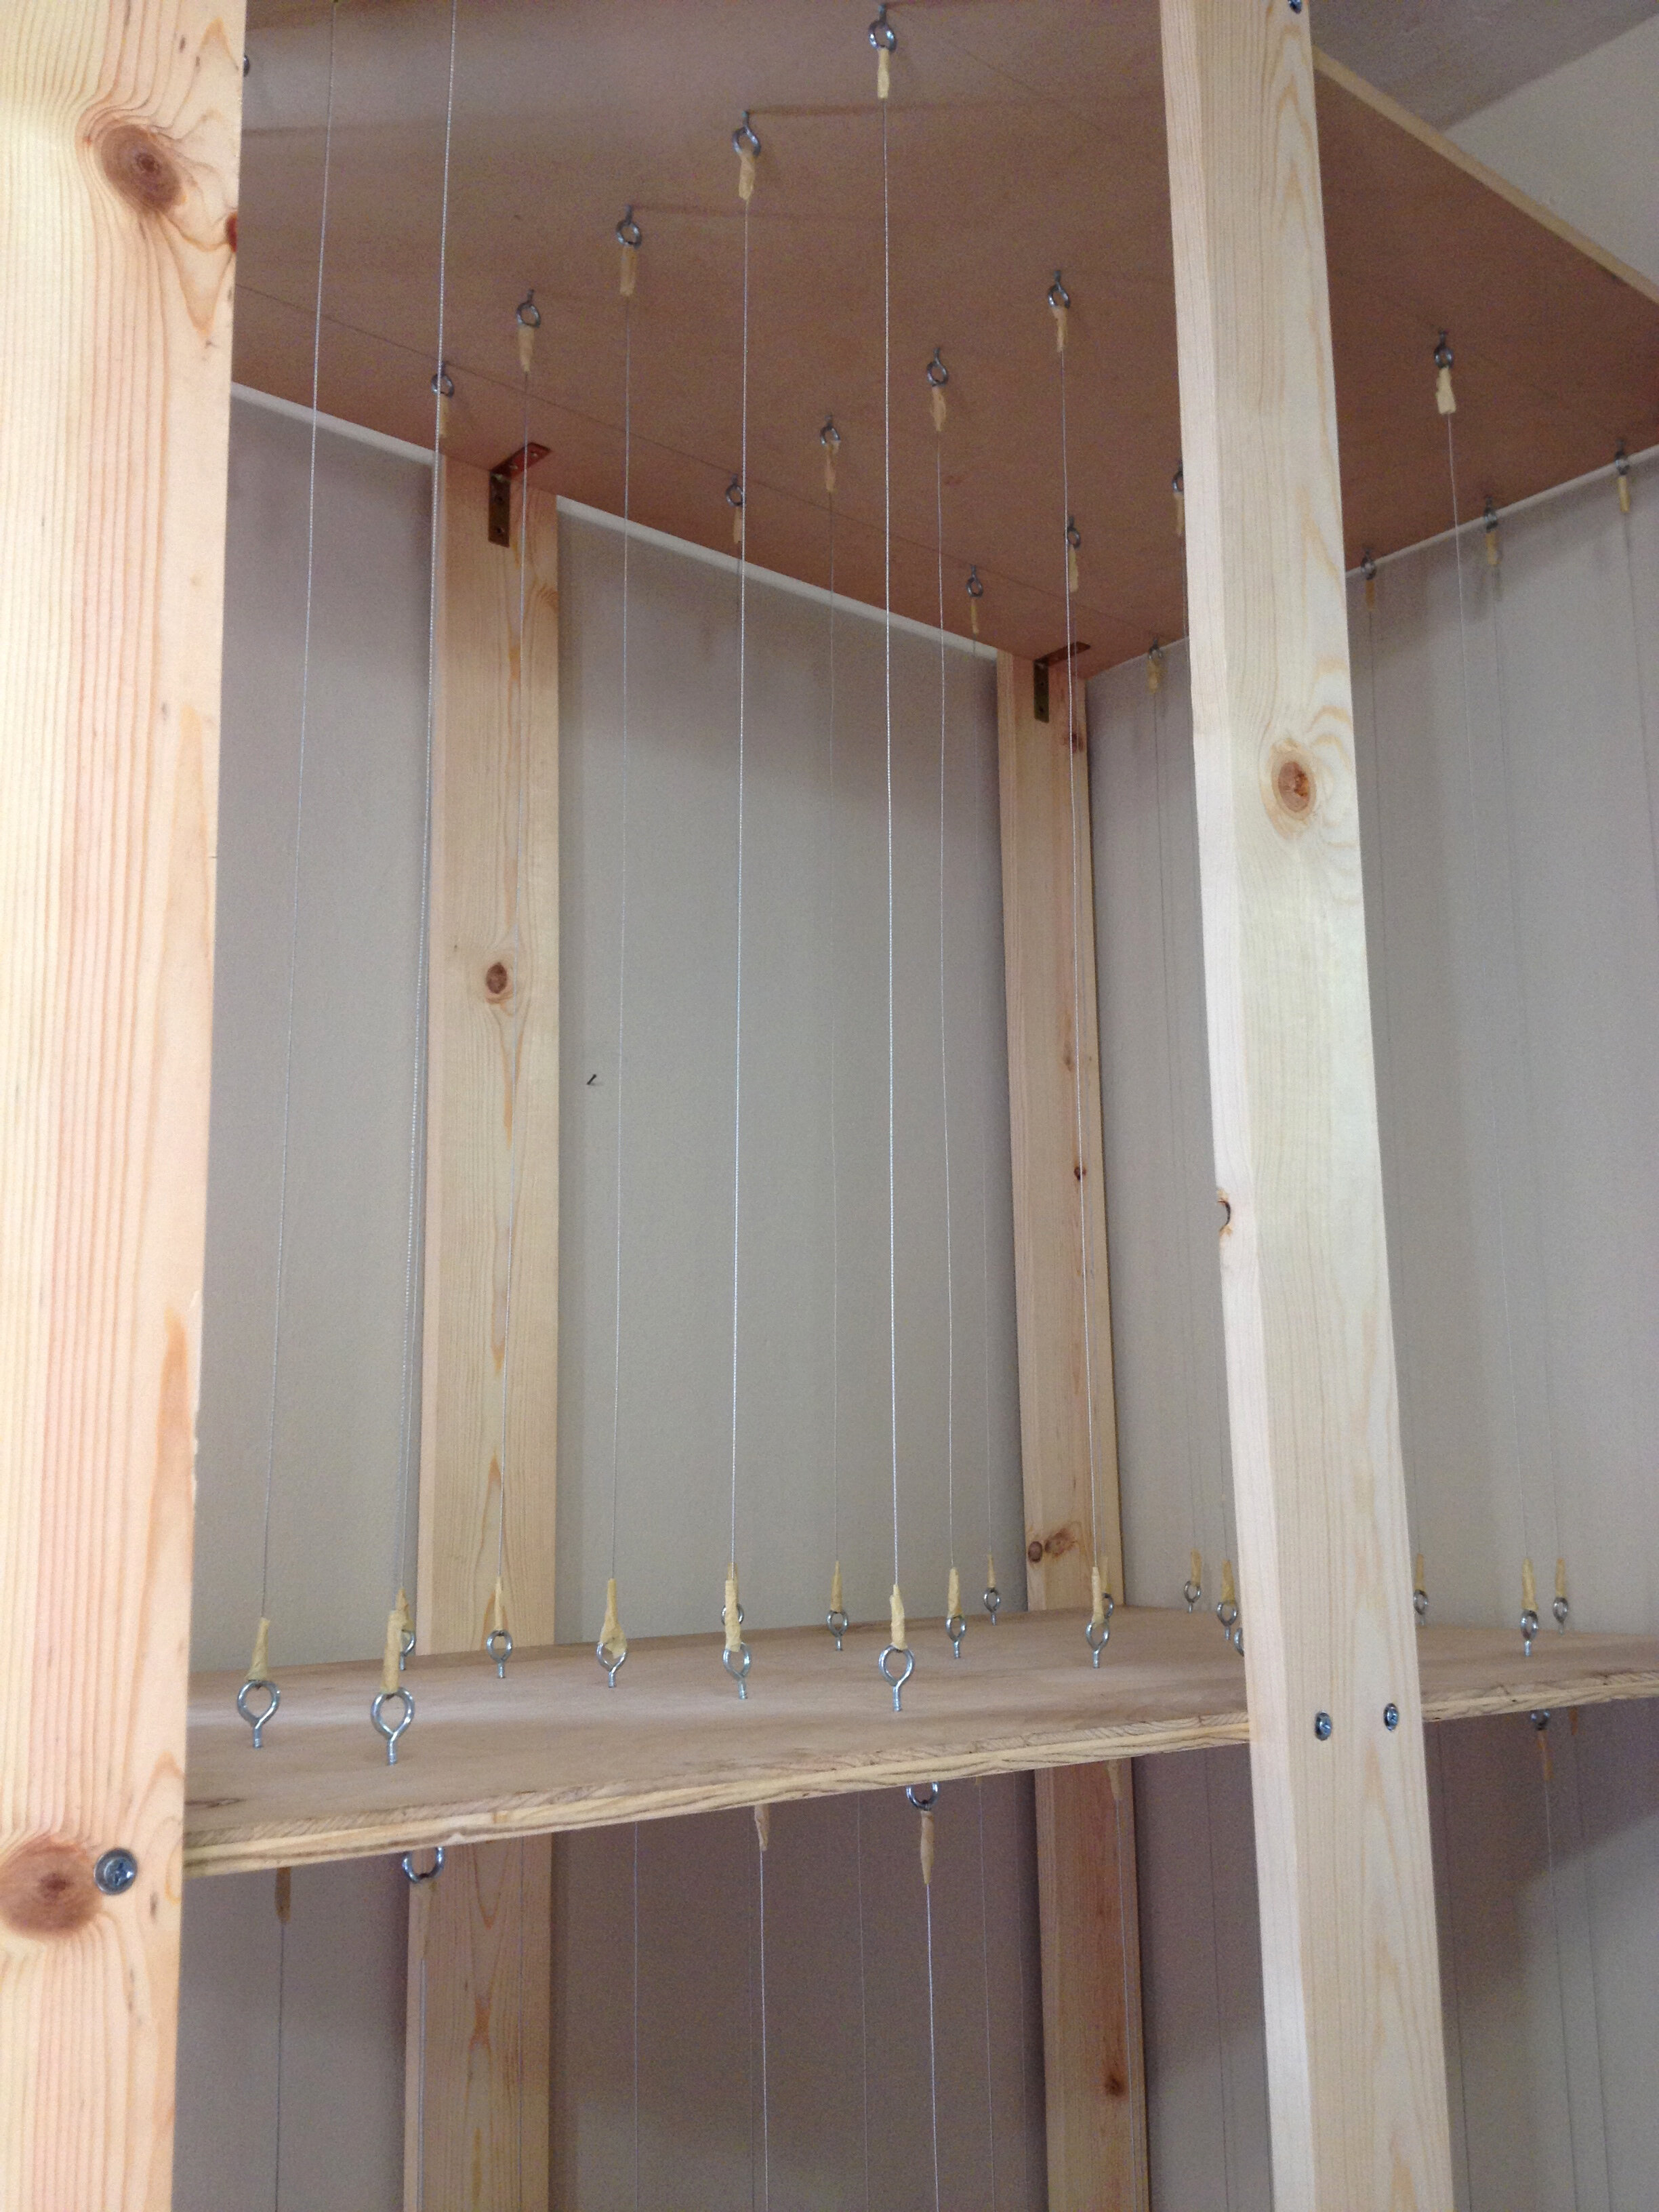
Closeup of the wire spacers…. *Tip: Once the wires are wrapped as taut as you can around the screws, twist the screws to tighten the wires even more so there’s as little slack as possible.
Ikea closet/wardrobe drying rack: This is my newest solution to the riddle of the drying rack. My apartment in London came with a few large furniture pieces, two of which were Ikea Wardrobe closets (I think). They have 3 adjustable shelves and two glass doors. The perfect setup for a decent size drying rack! I’m only using two of the shelves right now for the amount of paintings I’m storing…
Materials used:
Ikea Wardrobe/Closet (rented with the apartment)
Brown Craft paper
Rubber shelf liner
Small wooden shoe rack
Tape
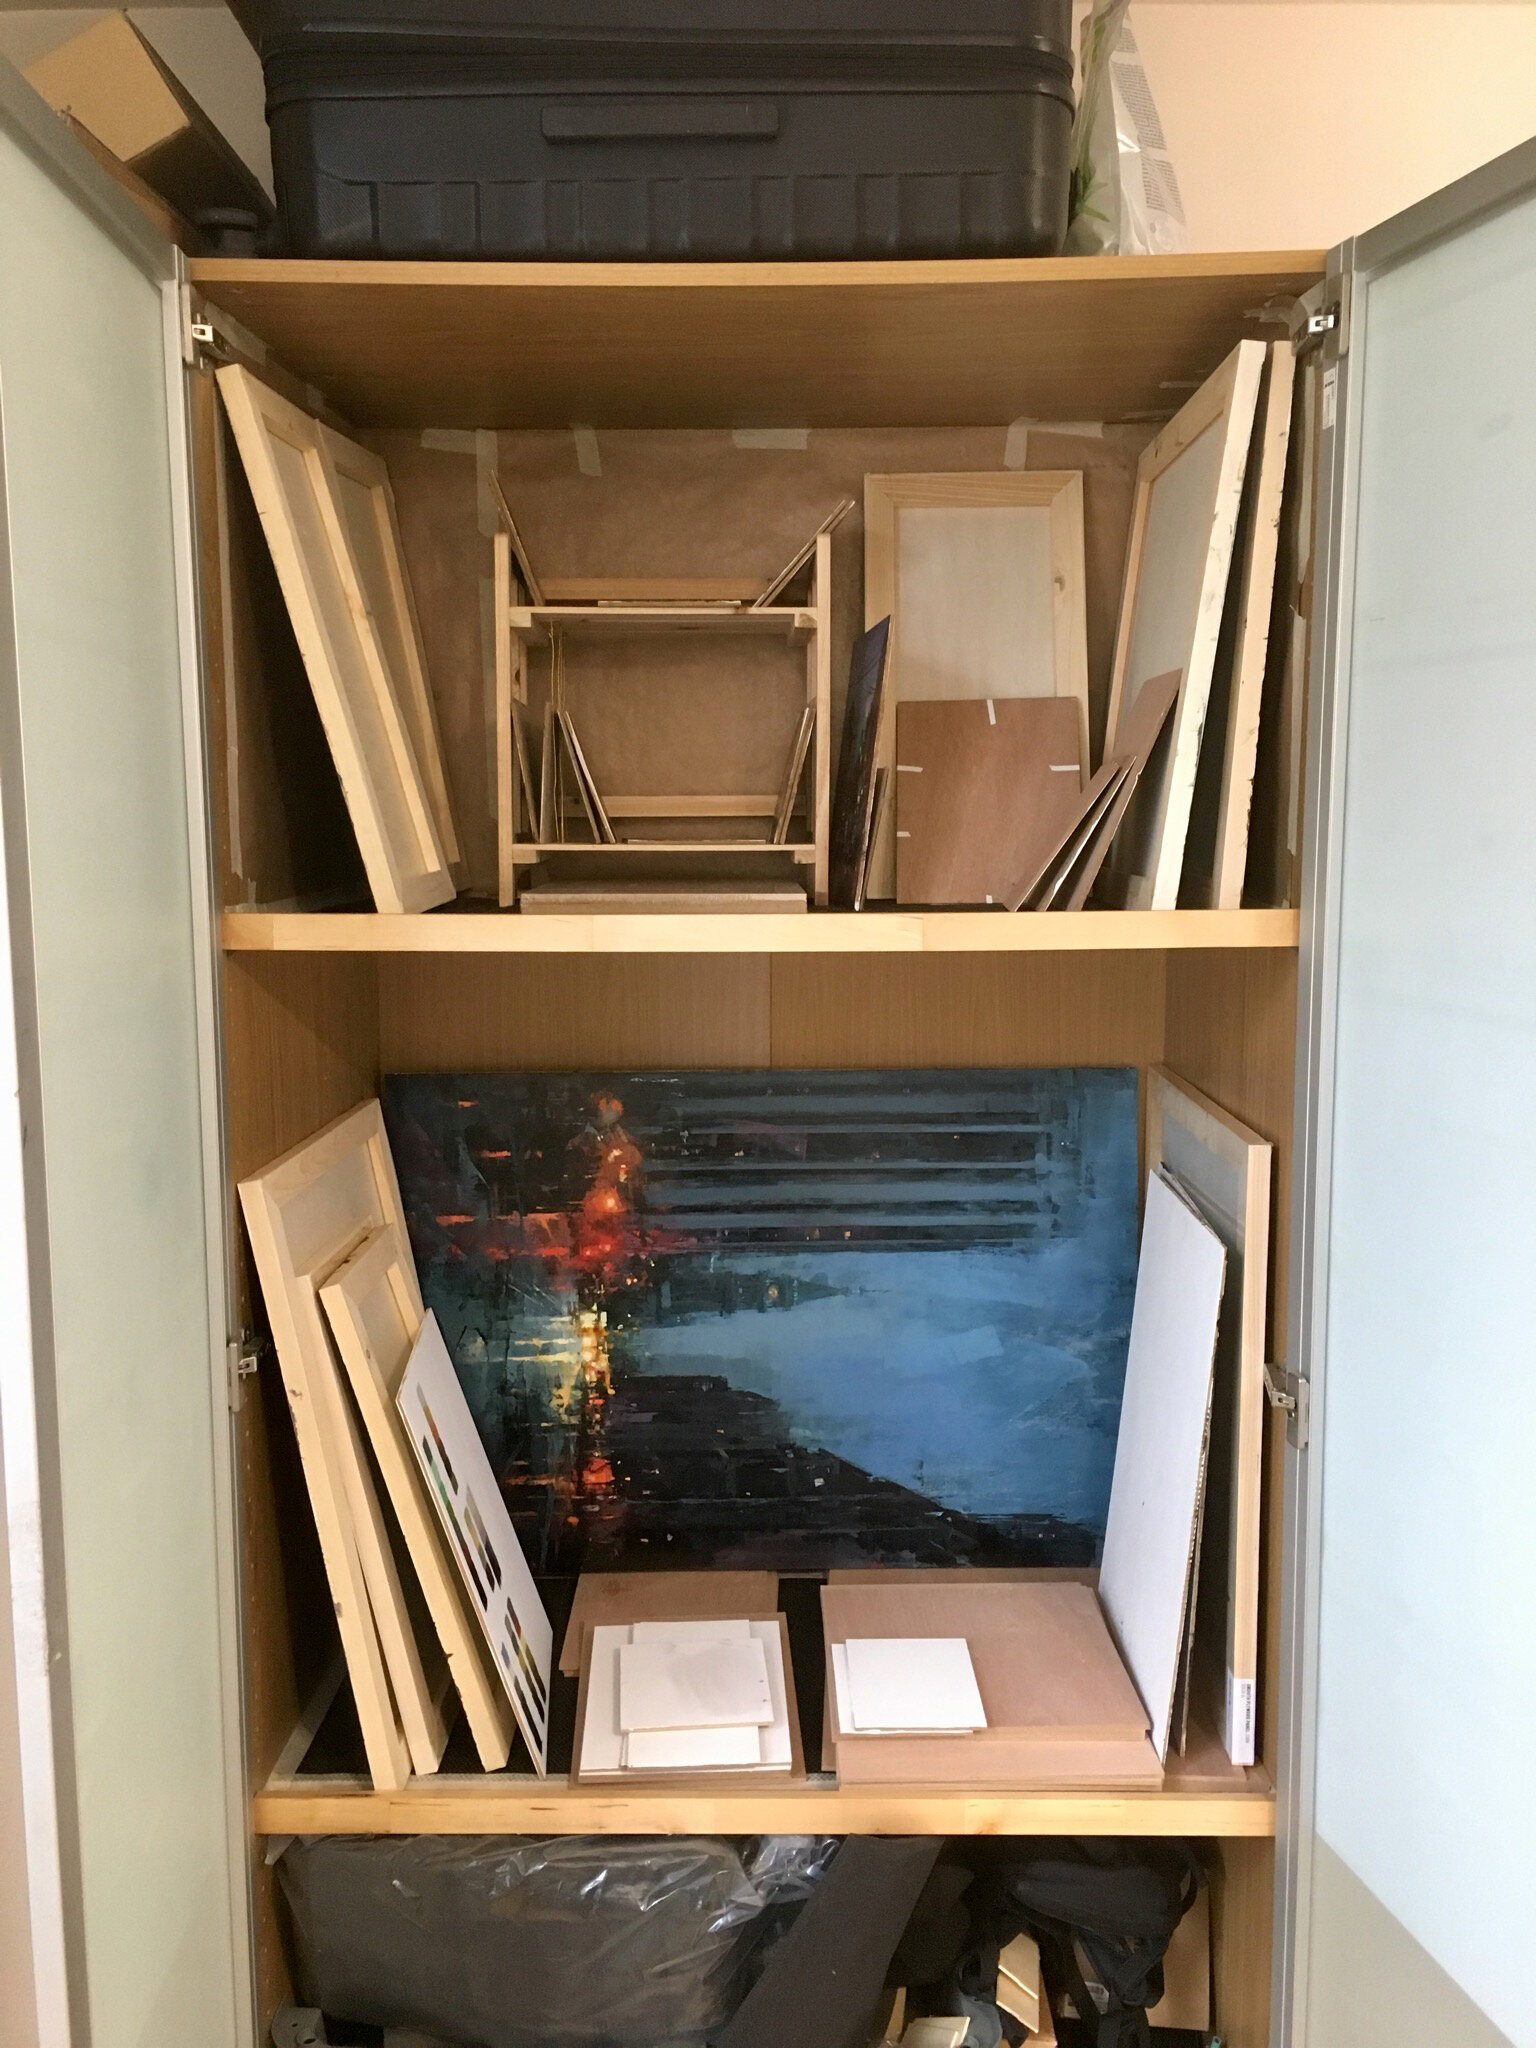
Top shelf: 21.5”H x 38”W x 22.5”D - Bottom shelf: 32.5”H x 38”W x 22.5”D *Blue cityscape painting on bottom shelf measures 24”x36”. It’s a larger space than it appears!
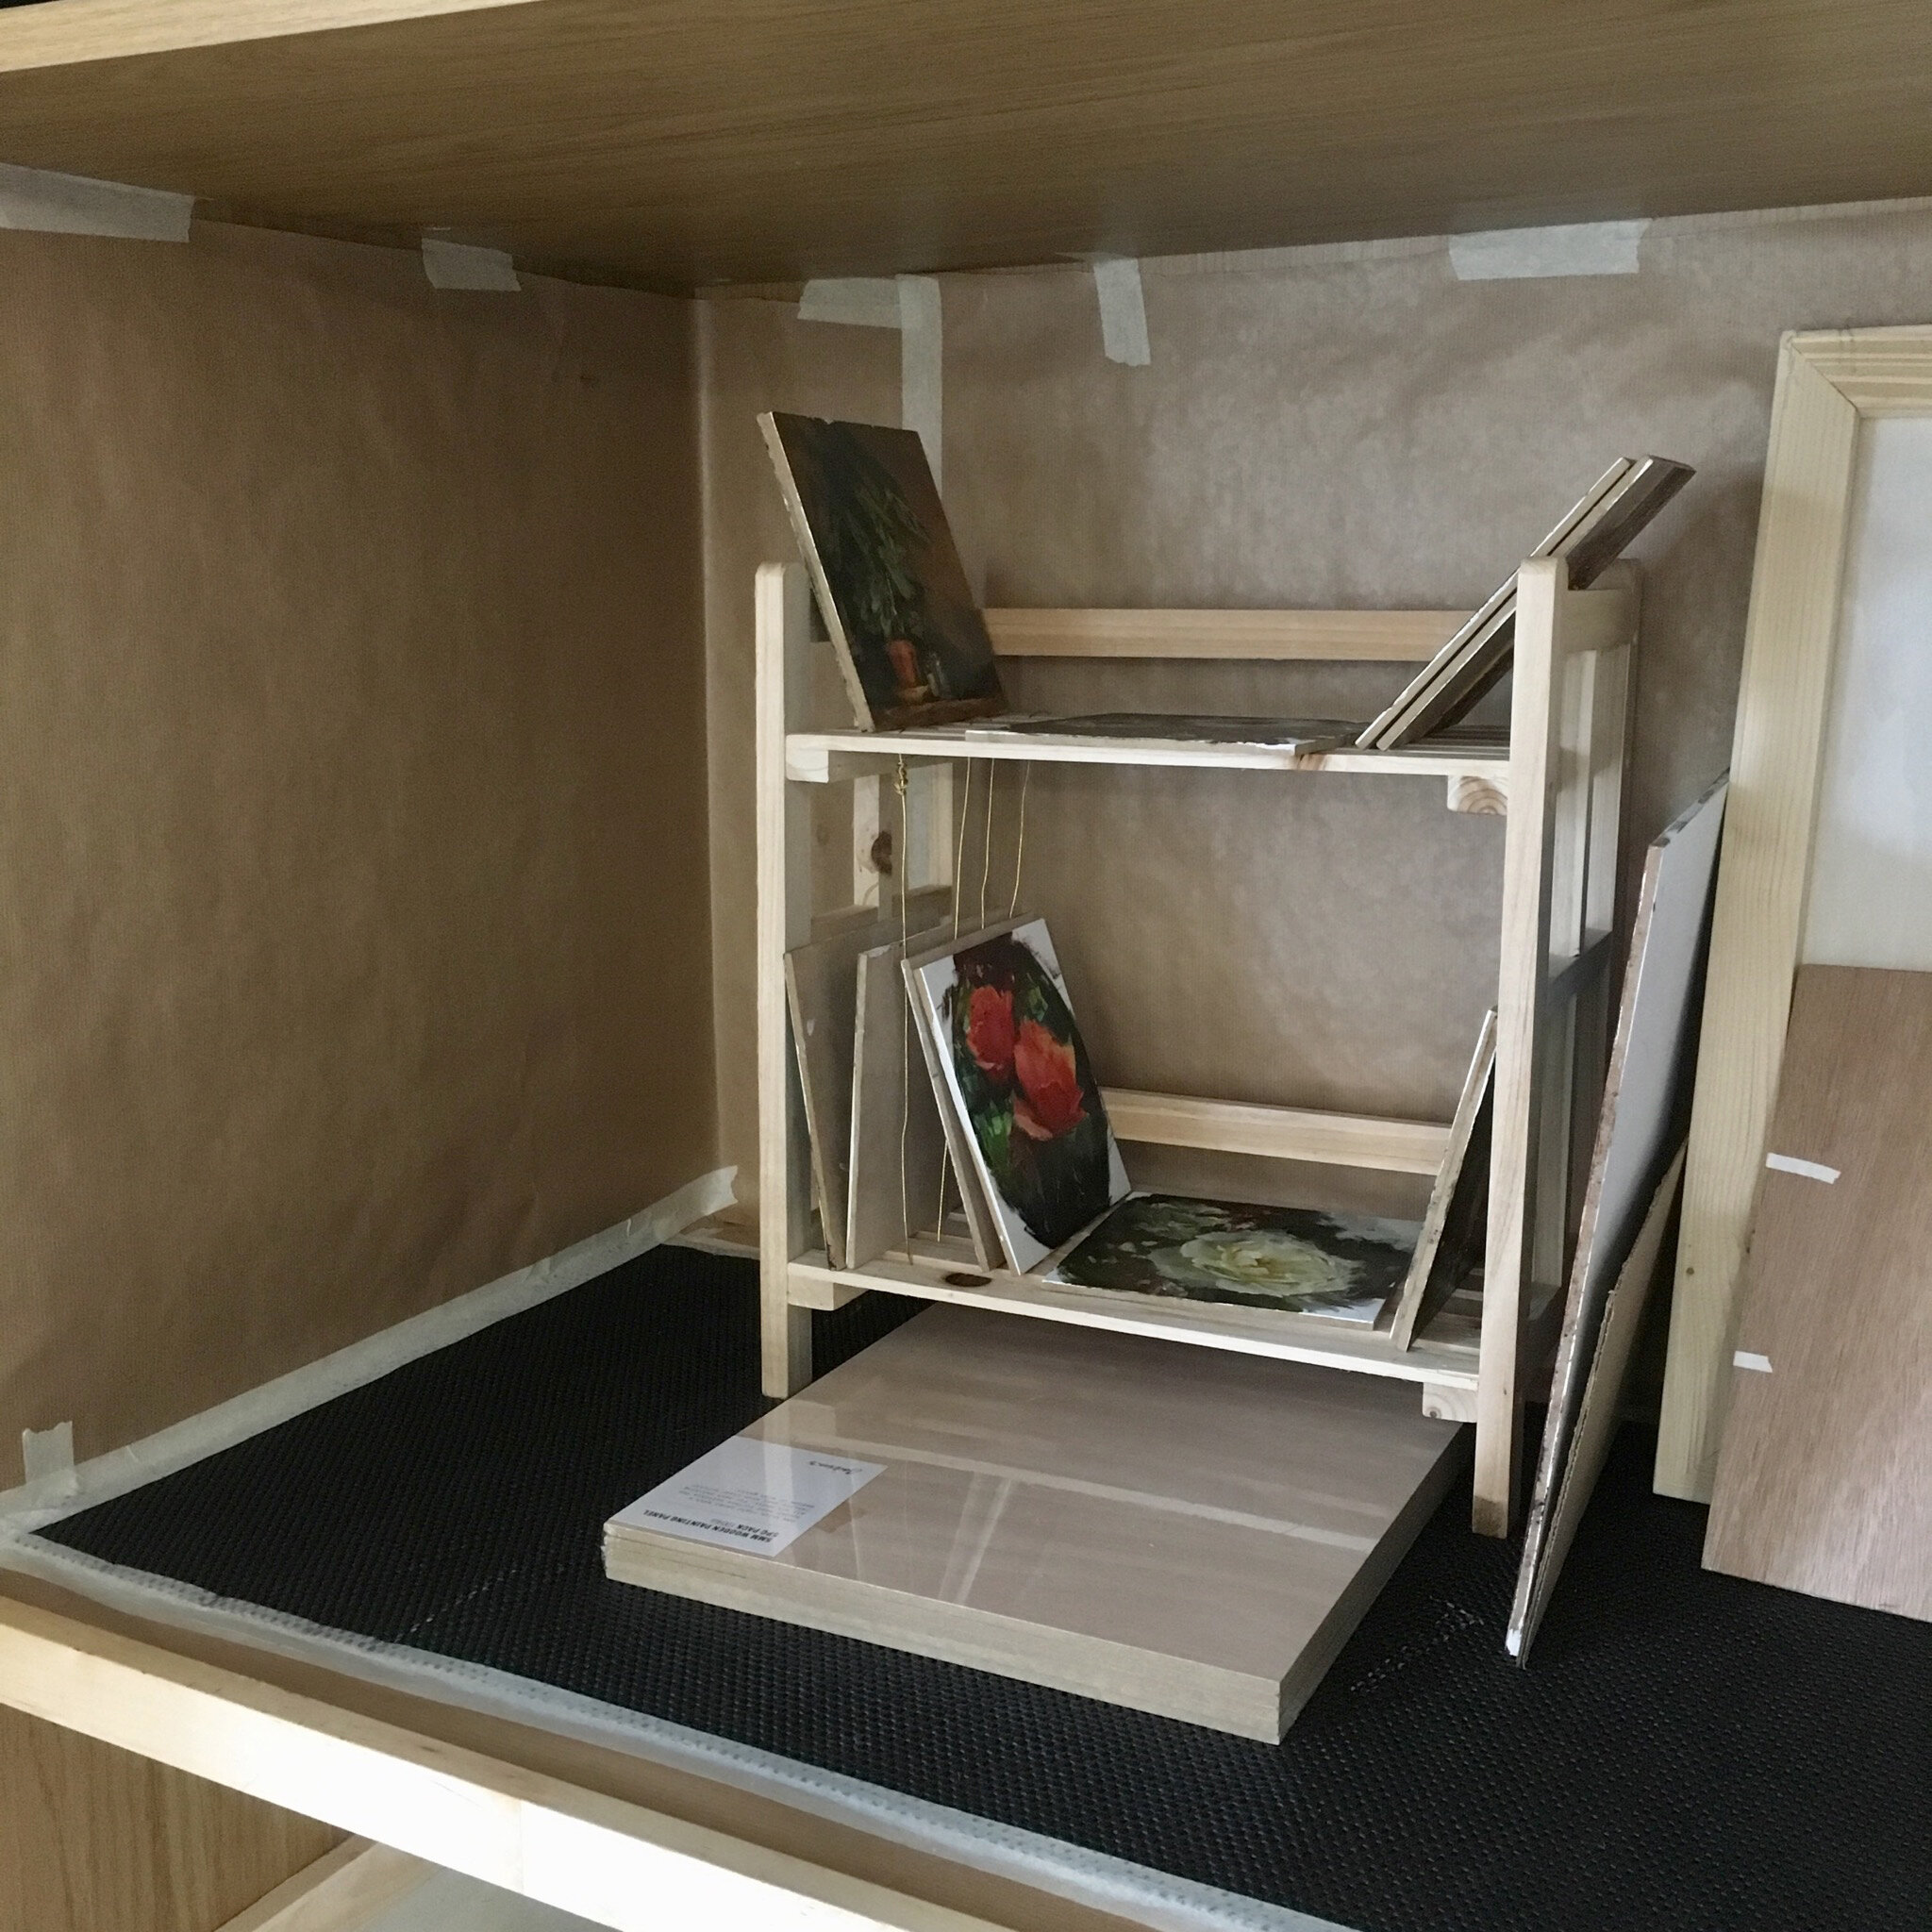
Top Shelf of the Ikea wardrobe “drying rack”…. Since this is a rented piece of furniture, I can’t attach wires to the interior or have it completely covered in paint by the time I’m done with it… so my solution was to line the shelf with rubber shelf lining, and cover the interior walls with brown craft paper. I added one little “shoe rack” to hold my 6”x6” paintings which is in the process of getting wired.
A few other ideas to get the wheels spinning. I have yet to try them, but they should work great...
Metal Organizer Wire Rack: I can see this working as a great base for a drying rack. It’s adjustable so you can cater it to large, medium and small paintings. All you would need to do is wrap picture wire around the wire shelfs about 4” apart to create the drying slots to store paintings. I would definitely tape the wire to the shelf once it’s wrapped so the wire doesn’t slip. :)
Metal frame, wood shelving rack: Another great base to customize however you need. You could use wire, doll rods, or even wood panels to create drying slots for your work. If I had the space, I’d invest in a few of these for sure!
Storage Cubes: These would be great for smaller work! You could string wire through the cubes to create several drying slots per cube.
*Also, a few more tips to help keep your paintings a little less dusty while drying (or once finished):
Always lean your paintings at an angle with painting side facing down. This way as dust continually pours down from the heavens, it’s not sprinkling directly onto your wet painting.
Keep your paintings off of the ground! Invisible dust and very visible dust bunnies are constantly getting kicked around on the floor, so store your paintings up as high as you can.
Bag up your finished work. As soon as your paintings are dry (either varnished or waiting for subsequent layers) keep them in plastic bags. This way you know for sure they’re protected from dust. *I do this once they’re varnished and have been dry to the touch for about a week.
If you need to speed up the drying time with a fan, always make sure your fan is clean before pointing it directly onto your painting.
I hope this was helpful, and if you have any other ideas or solutions to storing your creations, let me know!
Until next time friends…. stay safe and stay inspired!